Sharing my passion for handcrafted jewelry, paper making, and living a creative life.

Showing posts with label tutorials. Show all posts

Monday, May 9, 2011

One a Day in May - Day 8 - Hand Dipped Candles Tutorial

I had great plans for everything I was going to accomplish today,.  Oh well, it was Mother's Day so I'll give myself a break.  I did manage to hand dip a dozen pairs of beeswax candles at 26 dips a pair. Blogger isn't letting me download pictures tonight so I'll finish posting tomorrow.

The beeswax smells heavenly!
 It's not difficult to make hand dipped candles but it is somewhat tedious.  Here's my method.

I like to use pure beeswax for my hand dipped candles.  It smells great, burns beautifully, and people who are sensitive to the smoke from paraffin don't seem to experience the same problems with beeswax candles.

Materials and supplies
A large pot to use as a water bath.  Keep for candle dipping only.
Two cans to melt the wax in.  Olive oil cans work well.
About 10 pounds of pure beeswax.  You need extra to keep topping up the dipping can.
Flat braid wick.  I use #12 normally but it depends on what I can get.  The amount depends on how many pairs of candles you are dipping and the length which will be limited by the height of your dipping can.  Calculate the length of two finished candles plus about 3 inches for the exposed wick.  Cut to size.  (I usually dip about a dozen pairs in a session).
A dowel (broom handle works) extended between two stations to hang the dipped candles between dips.
About 1/2 metre waxed butcher wrap or other non stick surface.


Method
1.  Melt the wax in the two cans in the water bath.  The dipping can should be filled almost to the top with melted wax.  Just keep adding wax chunks as it melts to fill it.  The second can will be used to keep melted wax to top up the dipping can.

2.  Fold your length of wick over in the middle and grasp it lightly at the fold.

3.  Dip into the melted wax, leaving the top exposed, as shown.


4.  Carefully drape over the dowel.  Continue with each pair of candles. 

5.  Repeat steps 3 and 4 for about 10 dips.

6.  At this point, you will find that your candles are a little 'wonky' so I individually roll each pair back and forth gently on a non-stick surface to straighten them and I also trim off the bottoms that extend past the wick.  If you don't do this then eventually they'll be too long to submerse completely in the wax in your can.  After straightening each pair, hang them and do the next pair before going back to the beginning to start dipping again.  I do this again after the 20th dip.


6. Continue steps 3 and 4 until candles are the desired thickness.  I usually find that between 25 and 30 dips is a nice size and each pair weighs about 1/4 pound.  You will still have lots of wax left when you're done that you can add to for the next session.

7.  You will notice that the beeswax darkens as it cools.  It's best to let candles cure for a couple of weeks before using them as they will burn longer.

Note:  candles drip less if they are not exposed to a draft.  You can also colour your wax with chips made especially for dying wax.

Friday, May 6, 2011

One a Day in May - Day 6 - Paper Bag Tutorial

Here's a little tutorial for a simple gift bag.  I love making these in all sizes for gifts of jewelry, handmade soaps, candles, etc.  You can embellish them with pressed flowers, photographs or art to make them extra special.  I usually use my handmade papers but they are also a great way to use up your stash of decorative commercial papers.
 The sample shown here uses my handmade gladiola paper.  I left the top deckle edge but you could also fold the edge down at the start to if you would rather have a sharp edge and also to add strength if you are putting something heavy into the gift bag.
For your form, choose a scrap of board or other object the size of the bag you want to make. 

Your piece of paper dimensions
height - how tall you want the bag overall plus the depth of the base and the width of the fold if you are folding over the top edge

width - the total of the front, back and 2 sides plus about 1" overlap.

Adhesive - I like to use a glue stick but you can use any adhesive that will dry fairly quickly.

Fold over the top edge if you are not leaving a deckle edge.
Wrap the paper around the form and glue it closed.  It should extend past the form (the width of the base).


Fold the bottom over 'gift wrap style', gluing each fold to the paper beneath.  For an extra strong base, insert a piece of cardboard against the form before folding the paper in and glue the paper to the cardboard.
While the bag is still on the form, embellish if desired.
Remove the bag from the form.
 Pinch the edges together on each side and crease.  This will leave a triangle at the base on each side.
 Fold the base over to the back at the top of the triangle and crease.  The bag will lay flat (how flat depends on the bulk of the paper you use) for storing.

Now you can punch holes near the top of the bag if you wish, add brads for strength, and close with string or yarn.  Or you can just leave as is, fill with tissue paper and add a gift.

Have fun!


Monday, September 6, 2010

Beautiful Body Butter

This is my own special recipe for a really delightful body butter.


The ingredients can be varied according to your personal tastes and skin care requirements.  Just stick to the amount of beeswax called for and the same proportions of solids and liquids.  Add your own special blend of pure essential oils for natural fragrance and special skin care properties.


Body Butter Ingredients  (this recipe makes about 31/2 - 4 cups):

225 gm solid fats (cocoa butter, shea nut butter, mango butter, etc.)
50 gm pure natural beeswax
250 gm liquid oils (olive oil, jojoba oil, sweet almond oil, avocado oil - there are so many to choose from)
5 ml Vitamin E oil
Optional:  5-10 ml pure essential oils (depends on how strong you like your fragrance)


Melt your beeswax and fats (except the vit E oil and pure essential oils) together in a double boiler.  When they are melted, add the Vit E oil and pure essential oils.


Pour your melted fats into a bowl and let cool until the mix starts to solidify.  If your room is very warm, you can put the mix into the fridge.  Don't let it get too solid or you'll end up with small lumps of solid fat in your body butter.  You can always remelt and start over.

I recommend setting the bowl in a large box or plastic bin to whip so you don't get fat everywhere.  When the mix holds it's shape but the peaks aren't too stiff, spoon into containers.  Tap the container on the counter lightly to settle out air pockets.  Cover with a lid, store in a cool place, and enjoy!


Paired together with a lip balm, this makes a luxurious gift for someone special!

Sunday, August 1, 2010

How to Make Handmade Soap

I've been making my own soap for over 30 years, starting with the birth of my youngest child.  These were the back-to-the-land days and we had just bought our dream property, 80 acres with a very rustic old shack and a spectacular view.


We had no telephone and had to haul our water from a lake 3 miles away but we were so happy to have a place of our own.  We raised pigs, chickens, a couple of cows and 3 children there.  We hunted moose (one year it was me who bagged our moose), grouse and deer, caught fish, chopped wood, raised a garden and learned old-fashioned home arts with the help of my in-laws, our rural neighbours and some good books.


My first soaps were made with the lard and tallow I rendered from our pigs and cows.  I would grate it up to wash diapers in the old wringer/washer and delight in the fresh, clean smell of the sparkling white diapers coming off the clothes line.  Those really were my good old days.

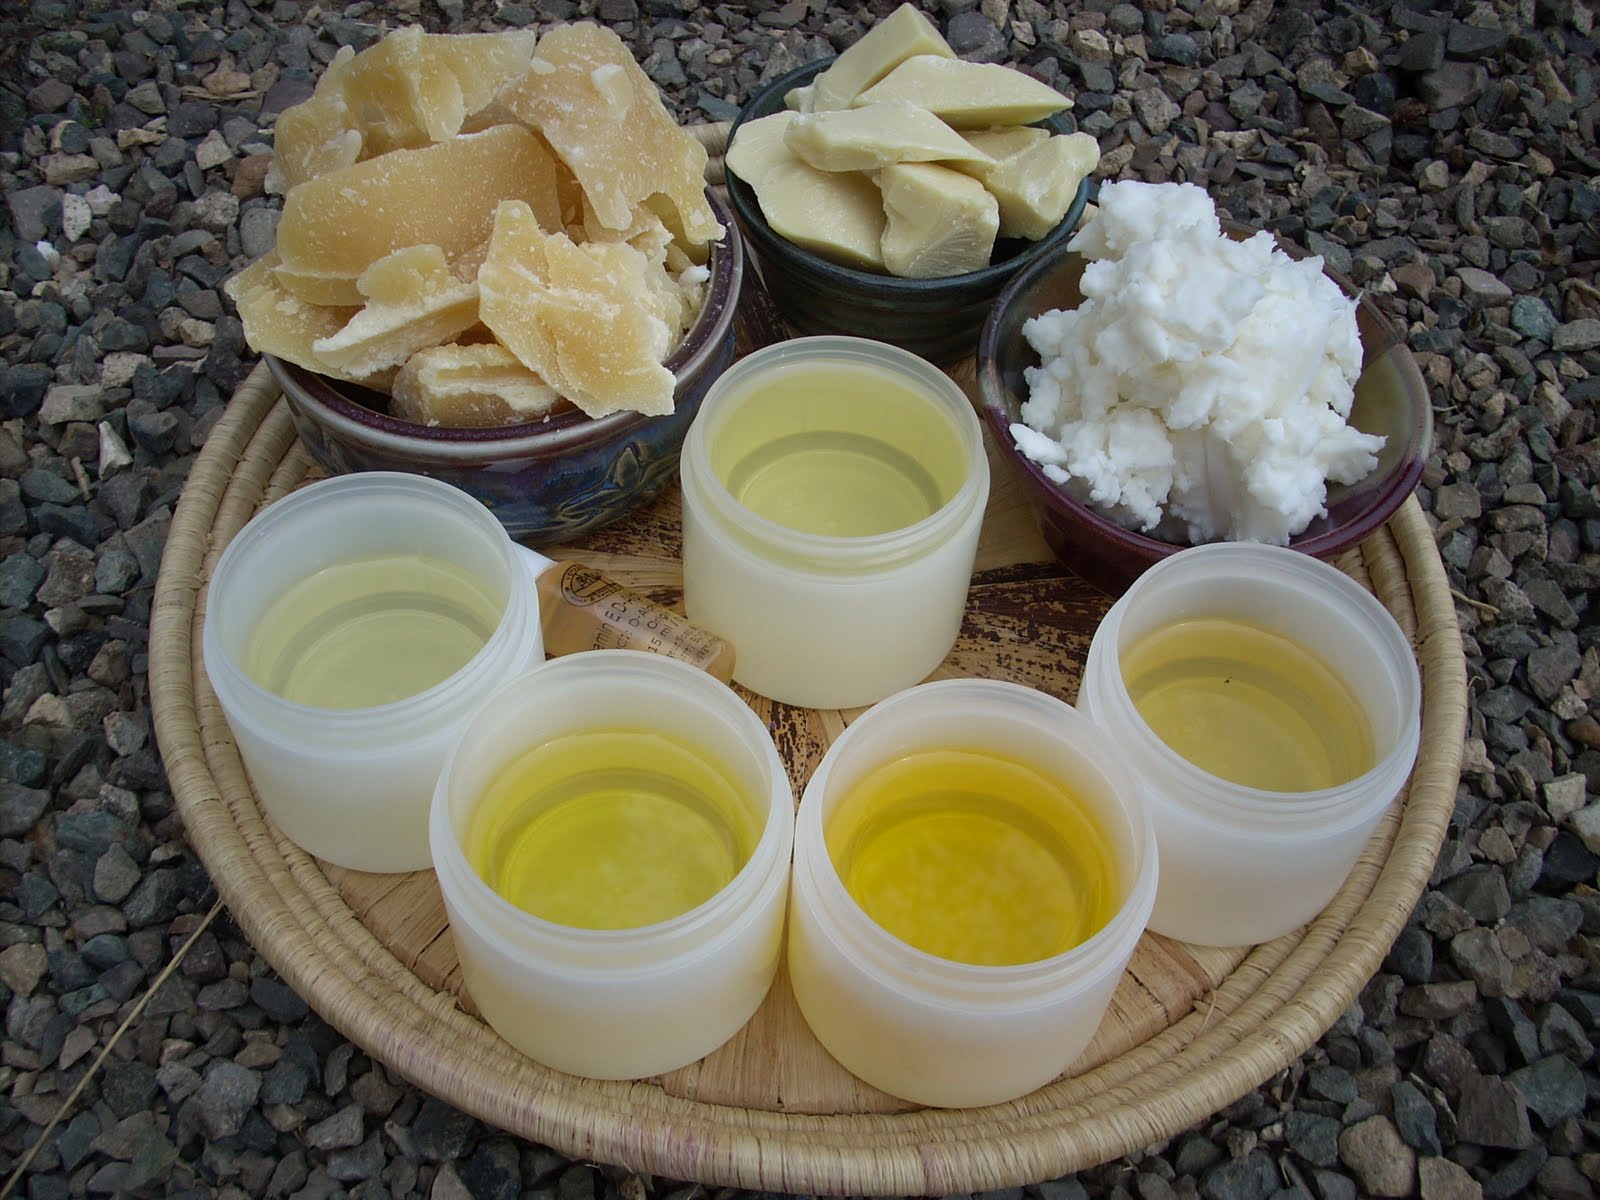
Well, life has changed and so has my soap.  I still use only natural ingredients but no animal products.  My oils are all vegetable based and I use pure essential oils for their scent and beneficial properties.  The colours come from herbs, spices, or cosmetic grade clays.


The single best thing about making your own natural soaps is that you are in control of the ingredients that go into something you use on your skin every day.  Superfatting the soaps, leaving excess oil in the bars, adds further benefits to your skin.  The shelf  life of natural soaps is limited due to the absence of artificial preservatives but the trade off is worth it!  You can use natural preservatives with limited effect but 6-12 months is the normal shelf life for superfatted, natural soap.


Soap is a salt produced by combining an acid (the fatty acids in your oils) with an alkali (the sodium hydroxide) in solution through a chemical reaction called saponification.  In cold process soapmaking, glycerine is the byproduct but it remains in the soap adding its own beneficial properties to your natural soap.

Since each type of fat has its own unique molecular structure, different amounts of alkali are required to saponify different fats.  This is why you can't just arbitrarily substitute one fat for another. 


Making up your own soap recipes, taking into account the properties you want your soap to have, is the really fun part.   You can combine as many different oils as you wish as long as you adjust your sodium hydroxide accordingly.   Smaller test batches are a good idea when first trying out a new formula.  I love creating a sensuous new blend of pure essential oils and then picking a great name for my new creation.

I will list some resources for free lye calculators at the end of this post.  Using these calculators you can easily design your own unique soap formulae with the qualities that you desire, including the quantity of free fat you want the soap to contain.  I like to work with 5-6% superfatting but you can use more.  I don't recommend less.

SAFETY FIRST
Don't skip these important precautions.  Raw soap, and the sodium hydroxide used to make the soap, are extremely caustic.  They will burn holes in most surfaces including your skin, clothes and furnishings.  Before starting, always:
- wear safety goggles
- wear protective clothing such as a big old shirt that covers your other clothing and your arms
- wear long pants, shoes and socks (no open toes)
- wear latex or nitrile gloves
- cover all surfaces that may be damaged by spills, including flooring.  Be sure that there are no obstacles that you might trip over while handling caustic materials
- work in a well ventilated area
- do not allow children or pets in the room while soapmaking is taking place or when the raw soap is initially curing.
- familiarize yourself with treatment for ingestion or burns from lye before starting


Do not inhale fumes from the lye while mixing it with the water.  I recommend using a chemical respirator to handle caustic fumes but  here is the method I use, as suggested in my favourite soapmaking book.  Hold your breath and stir while adding the lye to the water (never add water to the lye as it will spit).  After the initial stir to keep the crystals from solidifying to the bottom of the bowl, leave the room to breathe, then return after a few minutes to finish stirring until the crystals have dissolved.  You'll see some little floaty bits that are not lye and will not affect your soap. 

Soapmaking is not recommended for children.  (Not recommended for adults with a limited attention span, either!).


SUPPLIES AND MATERIALS
Don't use the same tools that you use for soapmaking for food preparation.

Materials
- an accurate scale that weighs in grams.  Spring loaded kitchen scales are generally not accurate enough.  Measurements need to be precise.
- measuring spoons
- a candy thermometer
- plastic containers for weighing the fats, the lye, and the water
- a large mixing bowl - glass, ceramic or stainless steel
- a smaller stainless steel or glass bowl for mixing the lye
- a stainless steel or wooden spoon for stirring the lye
- a stainless steel pot for melting fats
- a plastic tub or cardbox box for setting your bowl in for mixing to contain some of the mess
- a hand held electric mixer (works so much better than a wooden spoon for mixing the soap)
- waxed butcher wrap for lining your mold (regular waxed paper is too flimsy)
- a wooden or pyrex mold - a 9x13 pyrex dish will work for a single batch (about 15 bars)
- blankets or towels to keep soap warm during the initial cure
- heavy cardboard or a board to cover the mold

The following two recipes each make about 15 regular sized bars of soap.

Supplies for a 6% superfatted Olive Oil Soap
The lather from this soap is very silky and fine and it's a lovely creamy colour.  It's beautiful as is so I don't add any colour or scent to my olive oil soap (also known as Castile soap for its origins in Spain).
-1200 gm pomace olive oil (not virgin or extra virgin)
-152.79 gm NaOH (sodium hydroxide = lye)
- 356.51 gm water (distilled water is recommended because of impurities in well or tap water)

Supplies for a 5% superfatted Vegetable Oil Soap
- 500 gm pomace olive oil
- 350 gm coconut oil
- 350 gm palm oil
- 174.99 gm NaOH (lye)
- 409 gm water
- 6 tsp (30 ml) pure essential oils (optional)
- natural colour (optional)

Instructions (These are basic instructions for all cold process soap.  I use the terms oil or fat interchangeably.)
 
1.  Line your soap mold with the waxed butcher wrap and set aside on a blanket or towel on a sturdy flat surface.


2.  Carefully weigh out your fats and melt them together in a stainless steel pot.  Don't forget to add on the weight of your container!


Set fat aside to cool to 100 degrees F.  Your ingredients have to be warm enough (I usually aim for 100 to 105 degrees F) to initiate the chemical reaction.  As the reaction continues, it generates its own heat so that even after the raw soap has been in the mold for several hours, it will be very hot. 

3.  While your fats/oils are heating, weigh out your water and pour it into a stainless steel or heavy glass bowl.

4.  Wearing gloves and goggles, weigh out your lye crystals.

5.  Slowly add your lye crystals to the water following the method and recommendations in the above safety precautions (very important!!)


The lye solution now needs to cool to 100 degrees F, while your fats are also cooling (as the lye reacts with the water, a lot of heat is generated).  Some reheating may be required if one or the other cools too much.


6.  When the temperature of both the fat and the lye are at 100 degrees F, set your large mixing bowl in the containment area (box or tub) and pour in the fats.  Wear gloves and goggles! While mixing on the low speed of your electric mixer, slowly pour the lye solution into the oil.  Continue mixing thoroughly (bottom, sides) at medium to high speed.


After 5 to 10 minutes usually,  the soap will have reached "the trace".  This means that it has thickened enough that if you drizzle a small amount back into the bowl, it will form a pudding-like trail on the surface.  Once you can see this trail, the soap is ready to be carefully poured into the mold.  If you are using pure essential oils and/or natural colour, mix them in thoroughly at the trace, before pouring into the mold.


7.  After pouring, cover the mold with heavy cardboard or a board, leaving a little opening for moisture to escape.  Cover with more blankets or towels and leave at room temperature for 24 hours.  The soap is kept warm with blankets in a warm room because if it cools too quickly and the reaction is cut short, your soap will be ruined.  You cannot use a soap that has not fully reacted as it will remain caustic. 

8.  After 24 hours, the soap should be fairly hard and can now be removed from the mold.  Remove the waxed paper and cut into bars.


9.  Stack the bars brick-style or on racks so that air can flow around the bars to finish curing for a minimum of 2 weeks before using; preferably 4-6 weeks.  As your soap continues to cure, it will get milder.   More water evaporates making the bars harder and longer lasting.  The trays that bedding plants come on in the spring work great and if you are doing several batches of soap at a time they can be staggered and stacked.

It is best to store soaps in a moderate, dry environment.  Continuous exposure to heat and moisture will cause the fats in the soap to break down and become rancid more quickly. 

I have given you enough information to get started but there is so much more to know.  I recommend further reading, especially if you plan to make soaps to sell.  Have fun!

Resources and Suppliers:

The Web is full of wonderful resources and generous people willing to share their knowledge.  Just put in a search for natural soapmaking and you'll be amazed at what you can find - recipes, packaging ideas, ideas for colour and design, and mold-making are just some of the many ideas you'll find.

I have a lot of books on natural soapmaking but I am recommending just one, The Soapmaker's Companion by Susan Miller Cavitch.  As far as I'm concerned, Ms. Cavitch is the guru of natural soapmaking and this book is very thorough, covering everything from the chemistry of soapmaking to trouble shooting.

Voyageur Soap and Candle (located in Surrey, BC, Canada)
Cranberry Lane (located in Port Coquitlam, BC, Canada) - has a free lye calculator
Majestic Mountain Sage (located in Nibley, Utah, USA) - has a free lye calculator

Friday, July 16, 2010

Make your own yummy lip balm!

This luscious lip balm is my own 'secret' recipe, the one I sell, but I never was great at keeping my own secrets!


One of the best things about making your own lip balm from scratch is choosing your own pure, natural ingredients.  There is a lot of room to play with personal preferences and desires so use my ingredient list as a starting point for making your own unique blend.  These quantities will make about 20 average size lip balms.

Ingredients:  35 gm beeswax, 15 gm cocoa butter, 15 gm shea butter, 35 gm liquid oils (such as jojoba, avocado, sweet almond, olive, etc.), 10 drops vit E oil.  If you are sensitive or allergic to any ingredient, try substituting with another ingredient that has similar properties, keeping the same proportions of liquids and solids.  Titanium Dioxide can also be added as a natural sunscreen but please do your own research on this natural mineral if you choose to use it.


Weigh out all your ingredients (except Vitamin E which is heat sensitive) and melt them together in a double boiler (or equivalent as shown).  Stir in the Vitamin E after the other ingredients are melted.


Carefully pour the melted ingredients into the individual tubes.  I place my tubes on waxed butcher wrap so I can easily peel off the spilled ingredients to remelt later.  As your lip balms cool, they will form a dent on top.  You can add more lip balm to top them off or leave as is.  When cool, clean any spillage off the outsides of the tubes, cap, label (if desired) and enjoy!  Friends and family love getting these as gifts.


My lip balm pots use the same basic ingredients and method but are formulated to be slightly softer and are poured into small pots instead of tubes.  For six small pots use:  10 gm beeswax, 15 gm cocoa butter, 15 gm shea butter, 20 gm liquid oils, 10 drops Vit E oil.

I don't flavour my lip balms because of the possible negative effects of even the pure essential oils normally associated with lip balms.  If you choose to add an essential oil to your lip balm, please research it carefully.  Essential oils are very powerful and should not be used indiscriminately.   I also choose not to use any synthetic products in my handmade lip balms or other body care products.

Suppliers:
Voyageur Soap and Candle (located in Surrey, BC, Canada)
Cranberry Lane (located in Port Coquitlam, BC, Canada)
Majestic Mountain Sage (located in Nibley, Utah, USA)

Most soapmaking suppliers carry everything you'll need to make your own lip balms, including a wonderful assortment of containers in glass, plastic, and stainless steel.

Have fun!

Tuesday, June 8, 2010

Make Your Own Paper from Plants

I have been making paper for over 15 years and I love every step, from wandering around outdoors scoping out the plants to removing the finished sheets from the drying rack. It is so satisfying to use something free and renewable to create something beautiful.  Collecting plants for papermaking opens your eyes to more of our world. The desire to learn more, naturally follows as you seek to identify species suitable to the craft.

Collecting iris leaves about 15 years ago.
I first made paper in a weekend workshop taught by an instructor through an Emily Carr College outreach program .  We used cotton linters, abaca, and Japanese Kozo fibres.  Before the weekend was through I was already thinking about local plants that I might try on my own.

Swamp grass:  collected dry in late fall on left, dried fresh in summer on right

In this step by step tutorial, I'll take you through my process of making plant fibre paper, from start to finish.  See the bottom of this post for a list of supplies and materials.

Tuesday, May 18, 2010

Collecting More Plants for Paper

Fireweed blooming in late summer

I'll be doing the papermaking tutorial soon so here is a bit more information on collecting plants.  

Never collect fibre that you cannot identify and do not collect plants that have been identified as noxious weeds in your area.  Some plants can be irritants and some can be deadly, even to handle (water hemlock for example).

My goal is to provide basic instructions, making it as simple as possible for you to start making your own paper.  For more detailed information, there are some excellent books available.  Half the fun of making paper from scratch is making your own discoveries.  If you find a plant that is safe to use and you think it might make a nice paper, go ahead and try it.  Cost is negligible.

Sunday, May 9, 2010

Gathering Willow

It was a glorious day yesterday so, even though I had plenty of projects on my list needing attention, I let myself be side-tracked.  As Jo Packham said in the current issue of Where Women Create, "you will never "find" the time to do all of those things that inspire and nourish your creative soul...you simply must MAKE the time..."
Willow heart card on handmade willow paper

My handmade paper supply needs replenishing after a busy winter of card making and soap wrapping so it's time to start gathering materials. I love Mother Nature's Craft Store, where everything is free! 

Saturday, May 8, 2010

Pressing Flowers in the Microwave

If your only experience with pressing flowers is using an old-fashioned press or phone books, you will be pleasantly surprised by the results you'll get by pressing in the microwave.

But, before we start, here's my disclaimer:  I'm human therefore I'm fallible. You are human therefore you are fallible.  I do my best to ensure accuracy and completeness in my directions but I cannot guarantee results.  Please read my blog Terms of Use before proceeding.  If you're okay with all of this, then please continue!

Sunday, May 2, 2010

Starting this month - free tutorials!

Teaching has always been one of my favourite ways of sharing my art so, starting this month, I will be offering free art and craft tutorials on my blog.

In no certain order, here are some of the planned projects.  Topics will be divided into separate tutorials for each technique, where applicable.
Natural Dyes from Your Yard and Garden 
Creating dyes and applying them to cloth and paper.

 Working with Concrete 
Stepping stones, bird baths, benches and  planters.  Making your mixes from scratch and producing beautiful art for your yard and garden.

Making Handmade Paper from Plants and Recycled Paper 
From choosing and processing your plant materials to methods for forming and drying your handmade papers.
Creating with Your Handmade Papers 
Make beautiful and functional pieces from your selection of handmade papers.
Textile and Paper Art  
Most of these techniques can be applied to textiles or paper.  Low water immersion dyeing, batik and other resist methods, devore', marbling, silk screen, block printing, nature printing.
Basic Soapmaking 
Make your own natural vegetable oil based cold process soap.
Beautiful Body Butter and Lip Balms
Use the basic formulas as the starting point for your own unique blends that address your own skin care concerns and preferences.
Pressing Flowers in a Microwave

'Follow' my blog for updates and schedules. And spread the word!  Everyone is welcome.