Sharing my passion for handcrafted jewelry, paper making, and living a creative life.

Showing posts with label jewelry. Show all posts

Friday, February 26, 2021

Recycling Copper to Make Jewelry: is it worth it?

My answer to that question would be a resounding MAYBE! 

I thoroughly enjoy re-imagining pieces of junk into inspired pieces of wearable art. It also pleases me to repurpose what is already available rather than add to the depletion of our natural resources.

Bangles made from recycled plumbing pipe

My customers enjoy the back story that recycled materials create, and they also like contributing positively to the environment through their purchases.

I've been recycling copper into jewelry for the past 10 years and it has become such an integral part of my process that using purchased new copper would feel at odds with what my jewelry represents.

BUT, if saving money on materials was my only motivation for recycling copper, I probably wouldn't bother. Copper is relatively inexpensive to buy but my 'free' recycled copper costs me hours in labour that I rarely recover in the final price of my creations.

So, is recycling copper to make jewelry worth it to you?

If you want to try out recycling copper plumbing pipe, here is a free tutorial. Be sure to take all safety precautions recommended by the manufacturer of your tools. Wear a mask and safety glasses.

Cut the pipe to length with a pipe cutter, available at your local hardware store. Anneal with a torch. Quench.

Draw a guideline lengthwise with a marker.

Put the piece of pipe in a vise, horizontally.

Use a metal cutting wheel in a rotary tool (like a Dremel) and use oil to help keep the cutting wheel from overheating. I run it through some 3 in 1 oil each time I cut across the pipe. Grip the rotary tool firmly with both hands and run the cutting disk along the line you have marked, repeatedly, until it cuts through the copper. This can take awhile. Be careful of kickback, particularly as the wheel breaks through the copper. One one and half inch Dremel metal cutting disk (E-Z lock kind) lasts me through about three 8" lengths of pipe if I'm careful and lucky.


Remove pipe from vice and anneal and quench. Using pliers on both sides of cut, work the annealed pipe apart. Anneal and quench again if necessarily.  

Your next steps depend on how your sheet will be used.


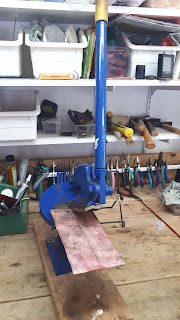
I use a throat shear purchased at an automotive supply shop (Princess Auto here in Canada) to cut my sheet into strips that will fit into my rolling mill. Don't try to cut too far along the strip at a time with the throat shear, otherwise it tends to curve. Annealing and quenching as needed, I roll out my cut pieces to the gauge I want and then cut those pieces to size with my throat shear.

Please excuse my crappy phone photos. I was taking the pictures as I worked through the process and I didn't have my good camera.

Monday, July 13, 2020

Do you want to be a jewelry artist?

I have to admit. I’m a bit of a jewelry snob. Creativity means much more to me than gold, diamonds and a hefty price tag.

That is why Susan Lenart Kazmer is one of my favourite jewelry artists. Her work is amazing! Last fall, I Jumped at the opportunity to sign up for Susan’s first 6 month Intentional Metalsmithing online jewelry course, a mentored program for beginning and advanced jewelry artists. There was no pressure to complete the course in the six month period as the videos continue to be available indefinitely. This worked well for me.

Susan is once again offering her mentored e-course, Intentional Metalsmithing. Susan teaches her techniques for creating exceptional artisan jewelry while encouraging and guiding participants to discover and use their own unique symbols and talismans in their designs.

Early bird pricing For the course ends tomorrow, July 14 but you can still sign up until July 16. The course starts on July 20. Even if you have never picked up a jewelry torch before, if you love creative jewelry, you’ll love this course!

Wednesday, April 8, 2020

100 Day Project - Day 1

Most of you have probably heard of The 100 Day Project #The100DayProject. You choose your own creative project to commit to for 100 days and post daily in the Facebook group.
Day 1 Getting ready
Retirement from my job away from home already meant I had lots of time to finally focus on my art and jewelry making. And now that social interaction has been restricted because of COVID-19, I have even more time. My problem has never been time, I realize now. I'm just a procrastinator.  There is always tomorrow, right?  But this pandemic is also teaching us that....maybe not.

So my 100 Day Project is to build a habit of spending time every day creating in my studio. No set times, just a commitment to do something. 100 Days to Build my Studio Habit.

Yesterday was Day 1 and I reorganized my jewelry studio to make my soldering area for jewelry more efficient. 

Monday, January 8, 2018

Happy New Year (finally)!

Hi everyone! Over a week into the new year but here I am finally. I've been giving this poor little blog disjointed starts for awhile now. This year I plan to change that. I even printed out some cool free Blog Post Planner sheets from a company called Productive Flourishing to keep me on track. They have lots of great planning tools on their website.

I haven't been very good about photographing my jewelry since I haven't been selling online but here are some pieces I did manage to get pictures of before the Christmas craft fairs this year. The leaves are made from old copper roof flashing that a friend found behind his shed. I annealed the copper and fold formed the leaves before using a blow torch to add several layers of enamel. The bails are made from obsolete Canadian copper pennies and I used recycled electrical wire for the jump rings and clasps.


I'm kind of excited to try some new strategies for growing my jewelry business and I'm starting by participating in a Jewelry Brand Makeover Boot camp. I've been a fan of Flourish and Thrive Academy for over a year now. I first discovered Tracy Matthews' podcasts while searching for something motivational to listen to while working in my studio. Flourish and Thrive Academy has a philosophy of Community over Competition and Tracy and her partner, Robin, share an incredible amount of free resources for jewelry designers at all levels. They also offer popular in depth courses for a fee. If you are a jewelry designer, you might want to check them out.

I'll see you again soon!


Tuesday, May 30, 2017

Cuttlefish Casting

I've been meaning to try casting with cuttlefish bone for some time and I finally got everything together so here is my first attempt. 


I used reclaimed sterling silver from a variety of sources after testing it first for silver content if it wasn't marked. 

I'm glad the first piece I did turned out because the next three didn't and I might have given up.  I learned from the flops, though, and as soon as I get some more cuttlebone I'll be at it again.  One of the things I learned is that the stench of burned cuttlefish bone doesn't leave the studio for hours!!! so next time I'll do this outside.

Saturday, July 26, 2014

60 in 60 Days 47-60!!

Well, true to my nature, I managed to procrastinate through the blogging part of this entire self-challenge.  I don't have to challenge myself to do something creative every day because that's just how I live.  It's like breathing.  I don't have to think about it or plan for it, I just do it.  Now, blogging about it, that's another story.

I want to be a good blogger but not if I have to commit to making time for it on a regular basis.  If there is one thing that I have learned in 60 years it's this; I don't like committing my time.  It's so easy to say I'll do something that involves a future time but, procrastination being what it is, that future time becomes the present and then it's panic time!  So I can either be a mediocre blogger on a regular basis or a good blogger when I feel like it.

So, today is the big day and I am just now posting about Days 47-60.

I worked on encaustic paintings for a show this fall at the Smithers Art Gallery. 

Sunflower, Encaustic on cradled board, 24x24
I worked on a lot of different earrings and other jewelry pieces for my table at a summer music festival. 

Earrings made from obsolete Canadian copper pennies
And I took hundreds of photographs! 

This young buck stopped to pose for me before he ran off into the trees.
I'll be back again sometime soon-ish, or a bit later, but eventually I'll post again and I hope you'll be back, too!  Thanks for stopping by.

Friday, July 11, 2014

60 in 60 Day 46

What a beautiful, sunny summer day!


I spent as much time outside as possible today making paper, staining deck rails, and drifting on my floaty chair with a beverage and a couple of jewelry magazines.


Handmade willow bark paper.  I mixed the processed willow bark with recycled kraft paper pulp.  For more info on how I make my paper see my previous papermaking tutorials.

Here are the earrings I made today from re-purposed Canadian copper pennies.

These ones are textured using a hammer and a brass plate from my scrapbooking days.  The stones are a greenish turquoise.

Folded with ammonia and salt patina and turquoise nuggets.

Textured in the rolling mill and patina added with a torch.
I'm not sure how some people manage to do a blog post every day but I'll do my best to keep it up for the remainder of this self-challenge. 


60 in 60 Day 44 and 45

I am having a booth at an upcoming music festival so most of my creative efforts in the next week will be going into finishing up jewelry projects.

I finished these pieces in the past two days.  All these earrings are made from repurposed copper pennies and use some of my favourite patinas - oven heat, torch with peanut oil and ammonia and salt.


I stopped to take some pictures of this Mama Duck and her little one (Common Goldeneye) on my way into town.  I always pull over and let the ferry traffic pass me on my way to town so it's easier to stop for any photo ops.

Tuesday, July 8, 2014

60 in 60 Day 43

Due to many different reasons (excuses?) and way too much procrastination, my challenge to do something creative every day for the 60 days leading up to my 60th birthday this summer, and to post about it, was drastically derailed.  I'm not going to even try to catch up now on posting  for Days 14 through 42 but I gathered and processed lots of plant fibre, made paper, did two encaustic paintings, made a few bracelets, took lots of photos, and taught a mosaic workshop.

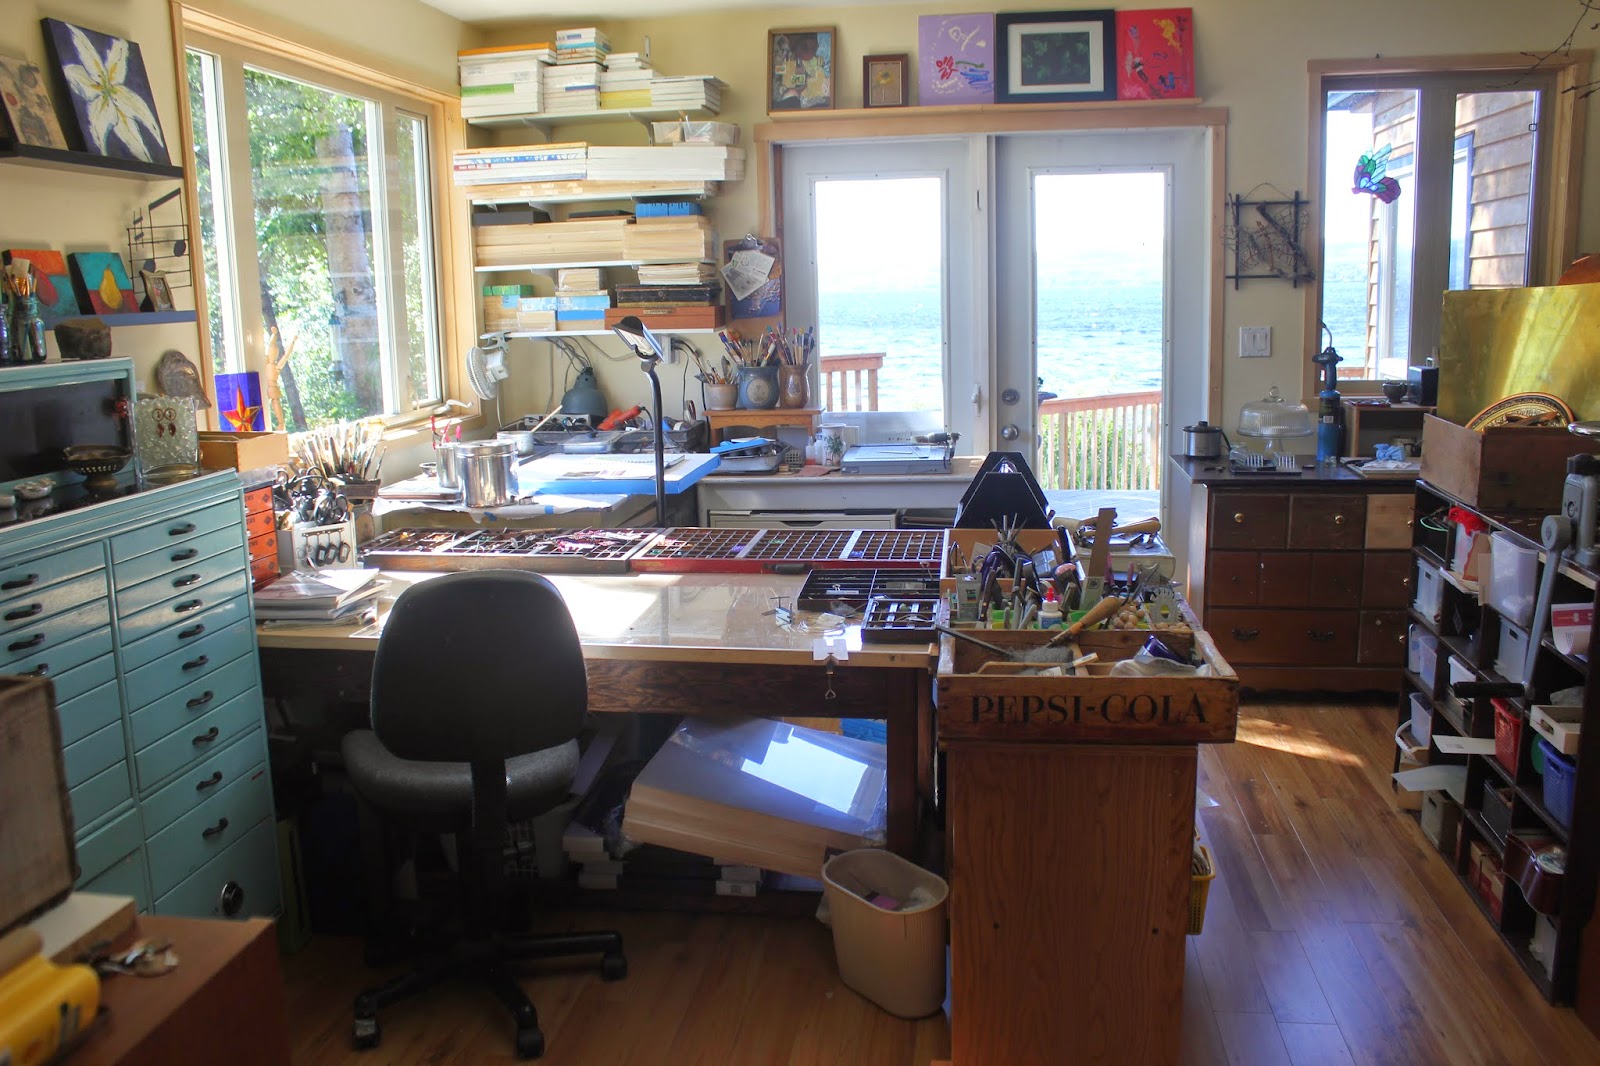
Today I restored order to my studio to get ready for a creatively productive summer.  Keeping things tidy with so many different interests is an ongoing battle.


I love this old dental cabinet for jewelry making supplies.


And printer trays for beads.


I keep my tools handy in vintage wooden boxes.

I finished one pair of earrings today but got started on several more.  Busy day tomorrow!

Made from copper pennies and freshwater pearls with sterling silver ear hooks.


Sunday, June 8, 2014

60in60 Days Nine to Thirteen

I haven't posted for a few days because, even though I did meet my challenge to do something creative every day, I didn't have anything completed to show for it.


I started a wrap bracelet on Day 9.  On Day 10 I was away all day so my creative effort was a photograph of the sunset at the end of the day.  More hummingbird photos on Day 11.  Day 12 and 13 were the weekend so I spent lots of time in my studio jumping from one project to another.


I played with resin for awhile and also got some pennies ready for making more earrings but those will be done another day.


I made pulp for papermaking and I spent about 5 frustrating hours on an encaustic painting on Saturday that became something completely different on Sunday!  Finished the wrap bracelet and made a pair of earrings.


  Posting my challenge is more challenging than the challenge itself!  My life would be so much simpler if I would just stick to one thing but I don't seem to be wired that way...or my wiring is loose!

Tuesday, June 3, 2014

60in60 Day Eight

I spent a little more time with the hummingbirds when I got home from work today (and the ants and wasps that also seem to enjoy the feeders). 


 I finished this wrap bracelet and used another cool button from my collection as the fastener.


I got a whole bag of vintage metal buttons at my local antique shop a couple of months ago and now  I'm waiting for some silicone putty to arrive so I can make molds of some of the more interesting designs before I use them all.


Monday, June 2, 2014

60in60 Day Seven

It's a good thing I had this little project already set up to go cause I was in the perfect mood to procrastinate, and it's only Day 7 of this challenge.  Once I get started I enjoy making these wrap bracelets cause the repetitive motion of weaving back and forth through the beads is quite meditative.

Leather wrap bracelet with vintage button and assorted dyed glass and stone beads.

Sunday, June 1, 2014

60in60 Day Six

I spent a little bit of the day in my studio and a huge part working outside and all I want to do now is sleep.  I am making these little pendants as thank you gifts for some volunteers from CAAT who will be in Burns Lake doing free spaying and neutering for low income families.  If you would like to know more, check out the Lakes Animal Friendship Society website.

I am using copper pennies as the base for the pendants.  Some are enamelled and some are just the copper. 

Thursday, May 29, 2014

60in60 Day Two and Three

Yes, I know, behind already!  I had the day at home yesterday due to a temporary closure at my work place so I spent the day in the yard doing hard labour.  While I was doing some tidying up, I spotted some ficus branches that I had pruned from my plant and thrown off the deck in the winter.   I noticed that a good amount of fibre was showing under the bark and it had just the perfect amount of moisture to come off easily so I stopped to strip all the branches for papermaking.  Now my live plant is in danger of severe pruning!

Day 2 Creative Act - stripped fibre from Ficus branches for papermaking


Today, I made some Boho style earrings.  I hammered these copper pennies to flatten them and then used a brass embossing template from my scrapbooking days and the ball end of my hammer to create the hearts.  The patina is from a gas torch.  Banded Agate, Tiger's Eye and copper beads on sterling silver wire and sterling silver ear wires complete the pair. 

Day 3 - copper earrings with sterling silver wire
These will show up in my Etsy shop in the next day or two.

Wednesday, May 28, 2014

Counting Down - 60 in 60 Day One

In 60 days (as of yesterday but I ran out of time to post), I will be 60.  On the one hand, I'm really pleased that I'm getting older cause you know what they say about the alternative!  On the other hand, I'm feeling very aware that I don't have a lot of time to waste, which is bad news for a born procrastinator.

Fellow artist and friend who I have never met in person but greatly admire, Violette Naranjo Clark, recently started a personal challenge of creating 60 cartoons (which she calls 'uptoons' for their uplifting messages) in 60 days in honour of her upcoming 60th birthday.  She invited other friends to join her for their special milestones.  This seemed like a good challenge to conquer my own procrastination challenges and celebrate who I am, turning 60.

My personal challenge for 60 in 60 is to do one creative thing each day, and to post about it on my blog, for the next 60 days until my 60th birthday on July 26 .

Day one (which was yesterday):  A triple wrap adjustable leather and bead bracelet with vintage button.

Sunday, March 16, 2014

More Patina Play on Copper

I'm trying to get into the habit of posting on my blog more regularly but life has a way of getting in the way and that's okay cause it's all good.  All I have to do is schedule myself a bit better.  Ha!!

I had a bit of time to play in my studio this weekend so I spent some of it playing with some more patina on copper penny earrings.  The first one, Liver of Sulphur, is pretty common.  I used the gel so all I had to do was stir it into some hot water (1 tsp of the Liver of Sulphur to 12 ounces of water).  I heated the copper a bit with the torch first so when I immersed the earrings in the solution, the colour developed very quickly and got quite black.  After rinsing and drying, I sanded the high points lightly for some contrast.
Copper earrings with Liver of Sulphur patina
On this next pair I decided to try layering a  couple of different techniques.  First I did a heat patina using peanut oil and the MAPP gas torch.  I lightly oiled the copper with peanut oil on a paper towel and then heated the earrings just until I got some colour variation - shades of brown and orange mostly.  Then I cleaned off the oil partially and spritzed the earrings with water, sprinkled with some salt, and left under a glass cake topper overnight with a small dish of ammonia.  This added some lovely turquoise blue colour to the mix.  Perfect compliment to the turquoise nuggets I added to these earrings.  If I had scrubbed more of the peanut oil off, I would have had more blue.  Maybe next time.  I love how they turned out anyway.
Copper earrings with peanut oil and MAPP gas patina topped with patina made with ammonia and salt
Jewelry making is so much fun!

Thursday, August 22, 2013

Adventures in Jewelry Making


I've been having a blast in my studio creating designs for my own jewelry, primarily using upcycled, reclaimed, and recycled stuff.


Cool stuff

I believe I now have enough older Canadian copper pennies to last my lifetime or until my arm gives out from hammering them flat on the bench block.  It takes about 50 blows with a 24 oz hammer to flatten each penny.  Oh, to be ambidextrous!  Friends and family know what kinds of treasure I covet so they watch for cool stuff wherever they go - old jewelry, beads, electrical wire...  

I first started making simple beaded jewelry about 25 years ago but I was more passionate about collecting pretty beads than I was about actually making the jewelry.  More recently, I became inspired by all the beautiful creations showing up in jewelry making publications on the market and started looking for more information.
 
I loved the look of metal but was intimidated by all the technical information.  I was wishing I could afford to take a course somewhere when I discovered a wonderful book called "Making Metal Jewelry" by Jen Cushman, an awesome designer and writer, who delivered the information in such a friendly way that nothing seemed too difficult to try.  That was my course!  I highly recommend this book.

Of course I had to set up another zone in my studio to accommodate my newest passion.

Jewelry making zone (shared with encaustic painting cause I really didn't have the space for another zone without giving something up and that's not likely to happen!)


One of my favourite techniques is creating a patina with the heat from my MAPP gas torch like on this pair of earrings that I made from copper pennies.


It's a good thing I did this blog post cause my work space was a bit of a mess and I had to tidy up to take the pictures.  Now I have enough room to spread out again, so... back to the studio!