My answer to that question would be a resounding MAYBE!
I thoroughly enjoy re-imagining pieces of junk into inspired pieces of wearable art. It also pleases me to repurpose what is already available rather than add to the depletion of our natural resources.
 |
| Bangles made from recycled plumbing pipe |
My customers enjoy the back story that recycled materials create, and they also like contributing positively to the environment through their purchases.
I've been recycling copper into jewelry for the past 10 years and it has become such an integral part of my process that using purchased new copper would feel at odds with what my jewelry represents.
BUT, if saving money on materials was my only motivation for recycling copper, I probably wouldn't bother. Copper is relatively inexpensive to buy but my 'free' recycled copper costs me hours in labour that I rarely recover in the final price of my creations.
So, is recycling copper to make jewelry worth it to you?

If you want to try out recycling copper plumbing pipe, here is a free tutorial. Be sure to take all safety precautions recommended by the manufacturer of your tools. Wear a mask and safety glasses.
 |
| Cut the pipe to length with a pipe cutter, available at your local hardware store. Anneal with a torch. Quench. |
 | ||||
| Remove pipe from vice and anneal and quench. Using pliers on both sides of cut, work the annealed pipe apart. Anneal and quench again if necessarily. |
 | ||
| Your next steps depend on how your sheet will be used. |
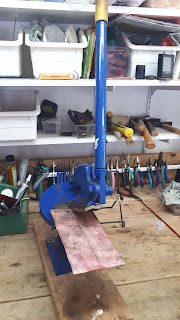
Please excuse my crappy phone photos. I was taking the pictures as I worked through the process and I didn't have my good camera.


Hi Liz-Anna, I really love your work. I just purchased four pairs of your earrings, I'm not usually that indulgent but they were far too fabulous to resist! (Comment left by Unknown but I accidently pressed delete instead of publish- amazing that these klutzy fingers can make jewelry!)
ReplyDeleteOops, left my message and forgot my name, sorry about that. Eileen =)
DeleteThanks, Eileen! I appreciate your feedback.
Delete